1. Searching and Adding files
To start with, Click 'Add Column button' to select camera footage from DCIM folders present in SD cards or in the system itself.
Learn how to add files: Add Files

2. Selecting Files
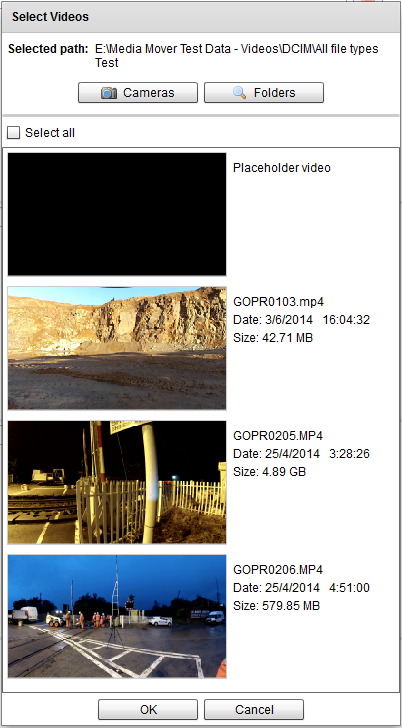
A new 'Select Videos' window will appear, with thumbnail images starting with 'blackvideo.mp4/Placeholder video' showing the files in the selected folder.
To select a single file: Click to select a single file
To select multiple files: Hold down the control key (ctrl) and click multiple files
To select a sequence of files: Hold down the shift key, select the first video then scroll to and click the last file in the desired sequence.
To select all the files except the placeholder, tick the 'Select all' checkbox.
Click 'OK', the files will be added to the current screen on the main window.
Click 'Browse' to browse off the folder and select some other folder.
Click 'Cancel' to go back to cameraList window.


3. Preview
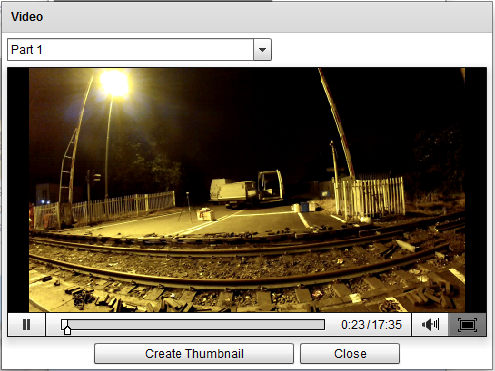
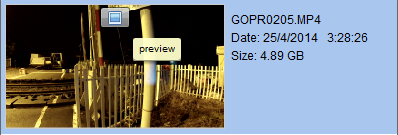
- Hover over each thumbnail image, a small rectangle will appear at the top of the thumbnail image.
- Click the rectangular button to preview the video.
- Check for the available thumbnail.
- If the thumbnail is not representative of the video content, play and pause the video until you find a clearer image
- .
- click 'Create Thumbnail'.
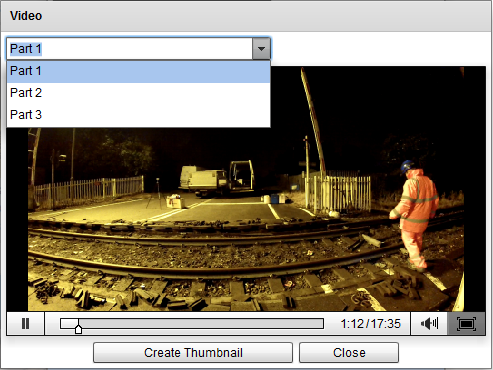
- If the video is a set of truncated videos, you
- can
- select a better
- thumbnail from
- any of the truncated parts, by playing each of them separately.
This Note: This makes it easier to recognise recognize which sets of videos belong together and in what order they should be arranged.
|    |
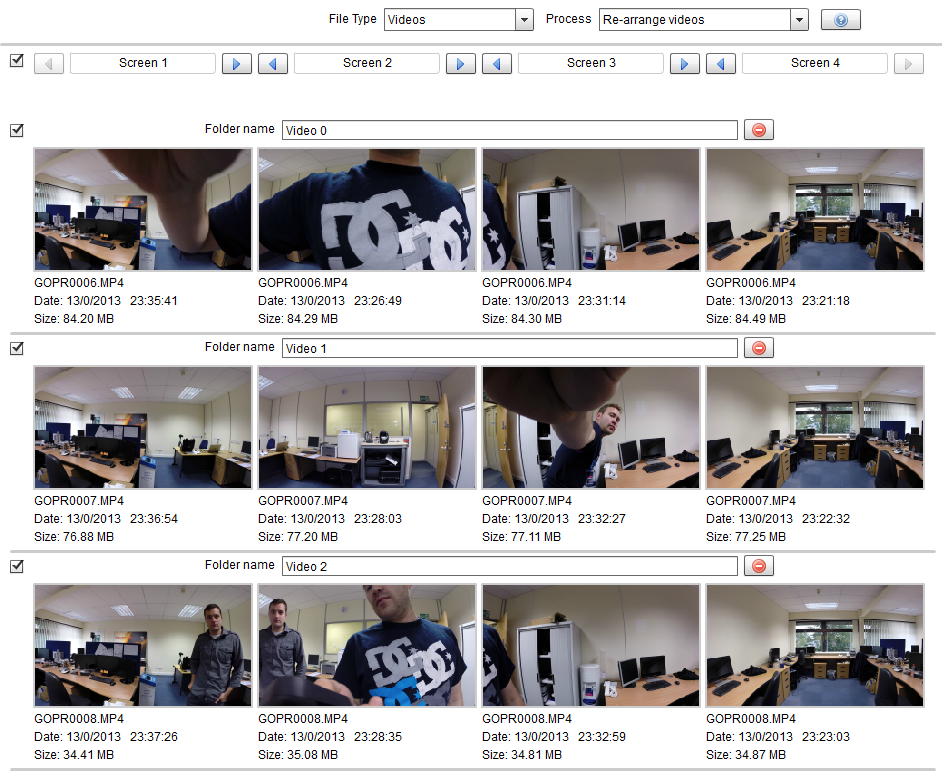
4. Build a file sequence
The previous process can be repeated- Repeat the previous process as many times as is needed to build a grid of files, arranged in columns and rows.
- To change the order of rows & columns, follow the link:
Order rows & columns - To add & delete files, delete row & column, and rename folder, follow the link:
Add-Delete-Rename
Note: The number of rows and columns depends on the number of cameras used and the number of separate shots created. Typically you will transfer data from a set of four SD cards.
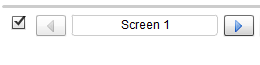
Hover over the screen label to access 'Delete All files', 'Add Files' and 'Delete column' buttons.
Browsing Files
Click the 'Browse' button.
A selection box marked 'Choose a folder' will open. Browse to the drive and folder that contains your videos.
The folder you finally select will have no files visible in it nevertheless, click 'Select Folder'.
Adding Files
Click the 'Add Files' button.
'Select Files' window will appear, having the files selected while adding the column previously.
Removing Folder
Click the 'Remove Folder' button.
That particular column will get deleted from the display, and the columns to the right will move towards left.
Removing Row
Click the 'delete row' button.
That particular row will be deleted from the display, and the rows below will move upwards.
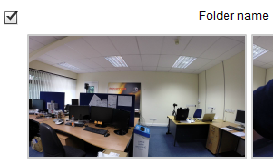
Renaming Folder name
Change the text in the folder name textbox. The name gets retained even after switching filetype.
5. Select the rows
- Click checkbox against each row to select individual rows.
- Click checkbox near screen label to select all the rows.
 |
|
6. Transfer
filesTo start the transfer process, clickFiles
- Click 'browse' at the bottom of the screen and choose file location.
- Navigate to a location on your hard drive or an external drive.
- Create a new sub-directory if required and click 'select folder'
Output
- .
- On browsing the folder, the transfer button will get enabled.
- Click 'Transfer' button. The transfer window will open, showing the processing of the selected rows.

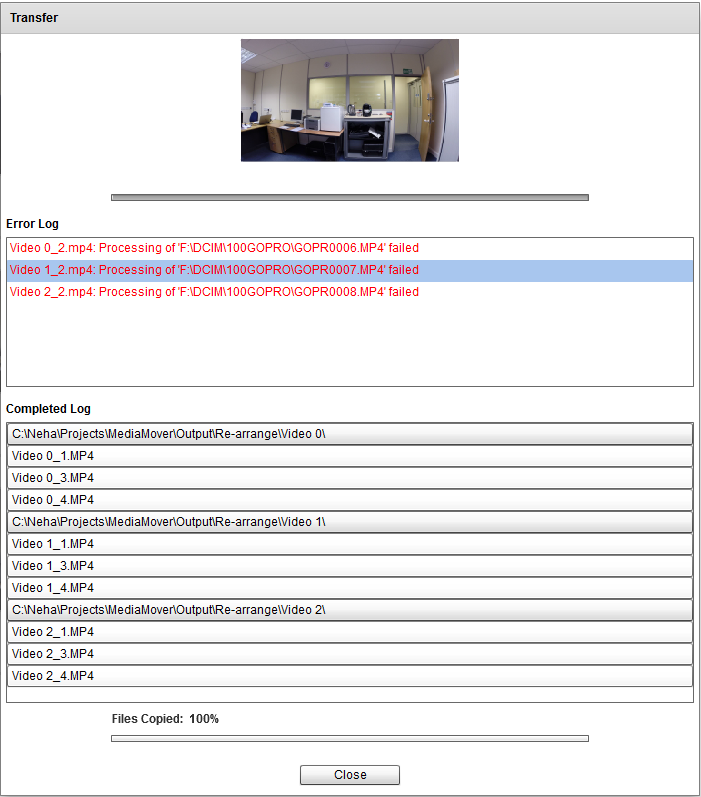
7. Output
Completed Log
Files should be present in their respective folders as shown in the completed log on the transfer window. In case of any truncated files, they should have been concatenated into a single file.
Error Log
If any file goes missing because of any of the reasons:
- SD card pulled out
- File deleted from the location
an error log will be displayed showing the unprocessed files(marked with red).
Note:
- Click on the folder path in the completed log to see the output.
- Click on any of the files in the error log, corresponding thumbnail can be seen at the top of the transfer window.